Do-it-yourself Brick Walkway
Many of the tools that you will need to make your own brick or paved walkway are familiar to any home maintenance project. If you have a yard, then you might already have a garden hose, rake, shovel, and trowel. You should have protection glasses and hardwearing gloves for this, and a broom, hammer or mallet, measuring tape, and scissors are also necessary. You will need yarn and stakes, along with anything you want to use for edging (brick, metal, wood, or plastic restraints), 2x4 or pipe pieces to use for leveling the layers, and if using wood for edging, a drill and propert bit. A wheelbarrow may come in handy to cart supplies to the designated point. You should be able to rent a plate compacting machine and brick cutter from Home Depot or Lowe's: bricks, gravel, and sand.
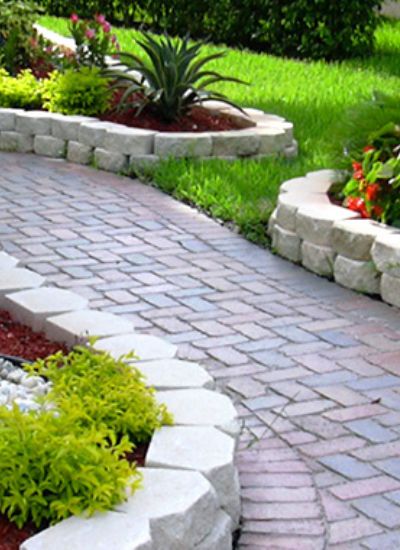
Be sure that you use materials explicitly meant for sidewalk or patio use. Gravel or crushed stone mixtures are an easier alternative to a concrete base layer. Do not use run of the mill bricks, such as the kind found in fireplaces, for this; paving bricks do not have the holes found in run of the mill bricks, and thus are more durable and safer to be used for ground implementation.
Initially, ensure that the place you fancy for the brick is secure. Test for any cable lines that may be hidden underground, and tree roots that may be bothered. Also make sure that there is some sort of angle or decline for run-off water, so that your yard or worse, your house, is not injured from rain or snow that has nowhere to wash away. To approximate the quantity of sand, gravel, and bricks you will need, determine the square footage of the design. Sand and gravel are usually referred to in cubic yards and one cubic yard is equal to roughly 27 cubic feet or 324 square feet, at one inch depths of coverage. Between four and five 4x8 inch bricks are needed per square foot, depending on the size of the brick and the shape of the design. It's always better to have more than less, so get an additional five to ten percent of the full amount of bricks, to allow for mistakes, edging, or even practice cuts.
Jump in! Outline the area with string and stakes, or a hose its if a circular design. Use a flat shovel to get rid of the dirt, (a trowel for any hard to reach areas), and then begin layering the gravel. Use the compactor in between layering to ensure a level foundation. Once you begin adding sand, use your leveling board materials to check for even levels by laying a couple of sections on the sand and running another piece over. Once smooth, eliminate the pieces and start applying the bricks and edging materials. Only compress the bricks once you are sure of the layout. Fill in any spaces between the bricks with sand, and rake or brush through to settle it down. Repeat brushing for the first few times after rain, to further strengthen the inlay.
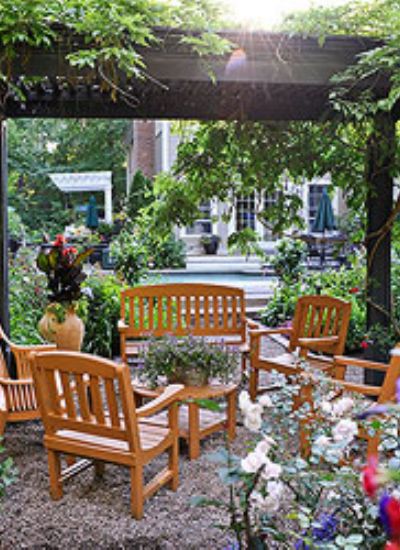
Don't forget to step back and admire your work! Clay-based paving bricks come in many hues of brown, cream, green, orange, pink, red, and shimmering with metallic touches. You can have the conventional rectangular shaped brick or custom cuts, all of which are slip resistant, which is comforting when walking in wet weather or without shoes. Common patio or walkway patterns include basket weave, herringbone, running bond, stacking bond, and all variations. Will you use a uniform or alternate model? Whatever you decide on, make your pathway a reflection of your personal style.
If you are looking for a new property, check out the Valley Center affordable houses for sale or the University Heights condos for sale. These properties are wonderful. Or check out the University City condos for sale. You'll love the ease of living in a condominium.
Be sure that you use materials explicitly meant for sidewalk or patio use. Gravel or crushed stone mixtures are an easier alternative to a concrete base layer. Do not use run of the mill bricks, such as the kind found in fireplaces, for this; paving bricks do not have the holes found in run of the mill bricks, and thus are more durable and safer to be used for ground implementation.
Initially, ensure that the place you fancy for the brick is secure. Test for any cable lines that may be hidden underground, and tree roots that may be bothered. Also make sure that there is some sort of angle or decline for run-off water, so that your yard or worse, your house, is not injured from rain or snow that has nowhere to wash away. To approximate the quantity of sand, gravel, and bricks you will need, determine the square footage of the design. Sand and gravel are usually referred to in cubic yards and one cubic yard is equal to roughly 27 cubic feet or 324 square feet, at one inch depths of coverage. Between four and five 4x8 inch bricks are needed per square foot, depending on the size of the brick and the shape of the design. It's always better to have more than less, so get an additional five to ten percent of the full amount of bricks, to allow for mistakes, edging, or even practice cuts.
Jump in! Outline the area with string and stakes, or a hose its if a circular design. Use a flat shovel to get rid of the dirt, (a trowel for any hard to reach areas), and then begin layering the gravel. Use the compactor in between layering to ensure a level foundation. Once you begin adding sand, use your leveling board materials to check for even levels by laying a couple of sections on the sand and running another piece over. Once smooth, eliminate the pieces and start applying the bricks and edging materials. Only compress the bricks once you are sure of the layout. Fill in any spaces between the bricks with sand, and rake or brush through to settle it down. Repeat brushing for the first few times after rain, to further strengthen the inlay.
Don't forget to step back and admire your work! Clay-based paving bricks come in many hues of brown, cream, green, orange, pink, red, and shimmering with metallic touches. You can have the conventional rectangular shaped brick or custom cuts, all of which are slip resistant, which is comforting when walking in wet weather or without shoes. Common patio or walkway patterns include basket weave, herringbone, running bond, stacking bond, and all variations. Will you use a uniform or alternate model? Whatever you decide on, make your pathway a reflection of your personal style.
If you are looking for a new property, check out the Valley Center affordable houses for sale or the University Heights condos for sale. These properties are wonderful. Or check out the University City condos for sale. You'll love the ease of living in a condominium.